 |
Building a report |
1) Set the connection to a cube:
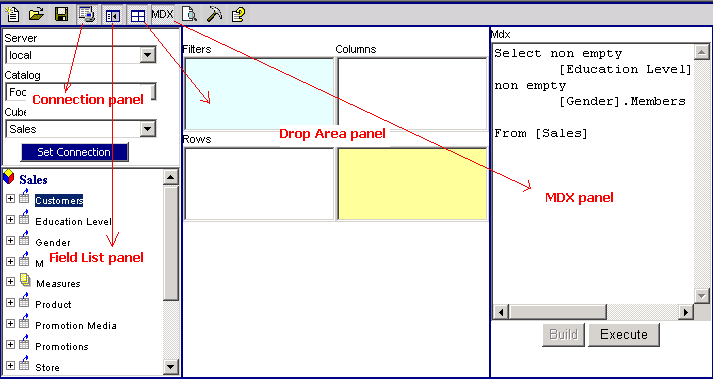
- Click the "Connect to cube" icon. The connection panel will appear.
- Select a server.
- Select a catalog.
- Select a cube.
- Click the "Set Connection" button. The field list will show dimensions for the new cube.
- Click the "Connect to cube" icon again. The connection panel will disappear.

2) Drag and drop dimensions, levels and measures onto the drop area panel:
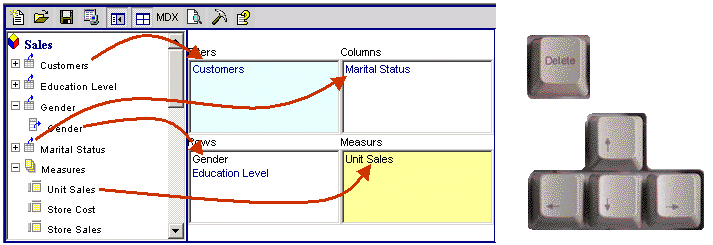
- Drag and drop dimensions from the field list panel onto the filter
section.
The filter dimensions will allow users dynamically change
the filter criteria
- Drag and drop measures from the field list panel onto the measures section.
- Drag and drop dimensions and levels from the field list panel onto the
rows and columns sections. One can not move the same dimension
(or levels from the same dimension) into the
rows and columns at the same time.
- To delete an item under fields, rows, columns and measures sections
select an item and press the delete key.
- To move an item under fields, rows, columns and measures sections
select an item and press the up or the down key.
- The report is executed and displayed as it is built.
Click the "MDX" icon to make the MDX panel visible. When the panel is visible
one has to press the "Build" and "Execute" buttons to manually build and execute the report.
This might be helpful when building a report that can take a long time to execute.
The report might take a log time to execute when
the the row or column axis has a large number of members.

3) Setup filters if they are selected.
- Navigate down to the member that should be the default.
- Click on the "pin" icon to restrict the report users
from navigating up from the selected member. This can be used to restrict users
from viewing restricted data. This technique can also be useful to restrict
the report from showing large number of members and taking a long time to execute.

4) Save a Report:
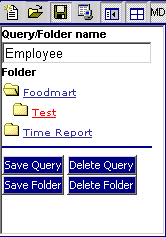
- Click the "Save" icon. The "Save" panel will appear.
- Enter the name of the report.
- Select a folder.
- Click the "Save Report" button.
- Click the "Save" icon again. The Save panel will disappear.

5) Create a folder:
- Click the "Save" icon. The "Save" panel will appear.
- Enter the name of the folder.
- Select the parent folder if creating a subfolder.
- Click the "Save Folder" button.
- Click the "Save" icon again. The Save panel will disappear.
6) Delete a folder:
- Click the "Save" icon. The "Save" panel will appear.
- Select the folder you want to delete. The folder can not have any
subfolders or queries in it.
- Click the "Delete Folder" button.
- Click the "Save" icon again. The Save panel will disappear.
7) Open a report:
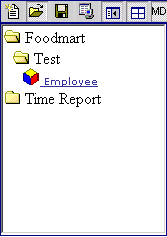
- Click the "Open Report" icon. The "Open Report" panel will appear.
- Expend Folders, locate the report and click on it. The report will open and
the "Open Report" panel will disappear.

8) Delete a report:
- Open a report.
- Click the "Save" icon. The "Save" panel will appear.
- Click the "Delete Report" button.
- Click the "Save" icon again. The Save panel will disappear.


